getmeli/meli
Platform for deploying static sites and frontend applications easily. Automatic SSL, deploy previews, reverse proxy, and more.
| repo name | getmeli/meli |
| repo link | https://github.com/getmeli/meli |
| homepage | |
| language | TypeScript |
| size (curr.) | 592 kB |
| stars (curr.) | 1764 |
| created | 2020-11-30 |
| license | Other |
Getting started
Want to change the way you ship fronend, forever ? Let’s get started !
- Head to our installation instructions
- After you have installed Meli and have successfully logged in:
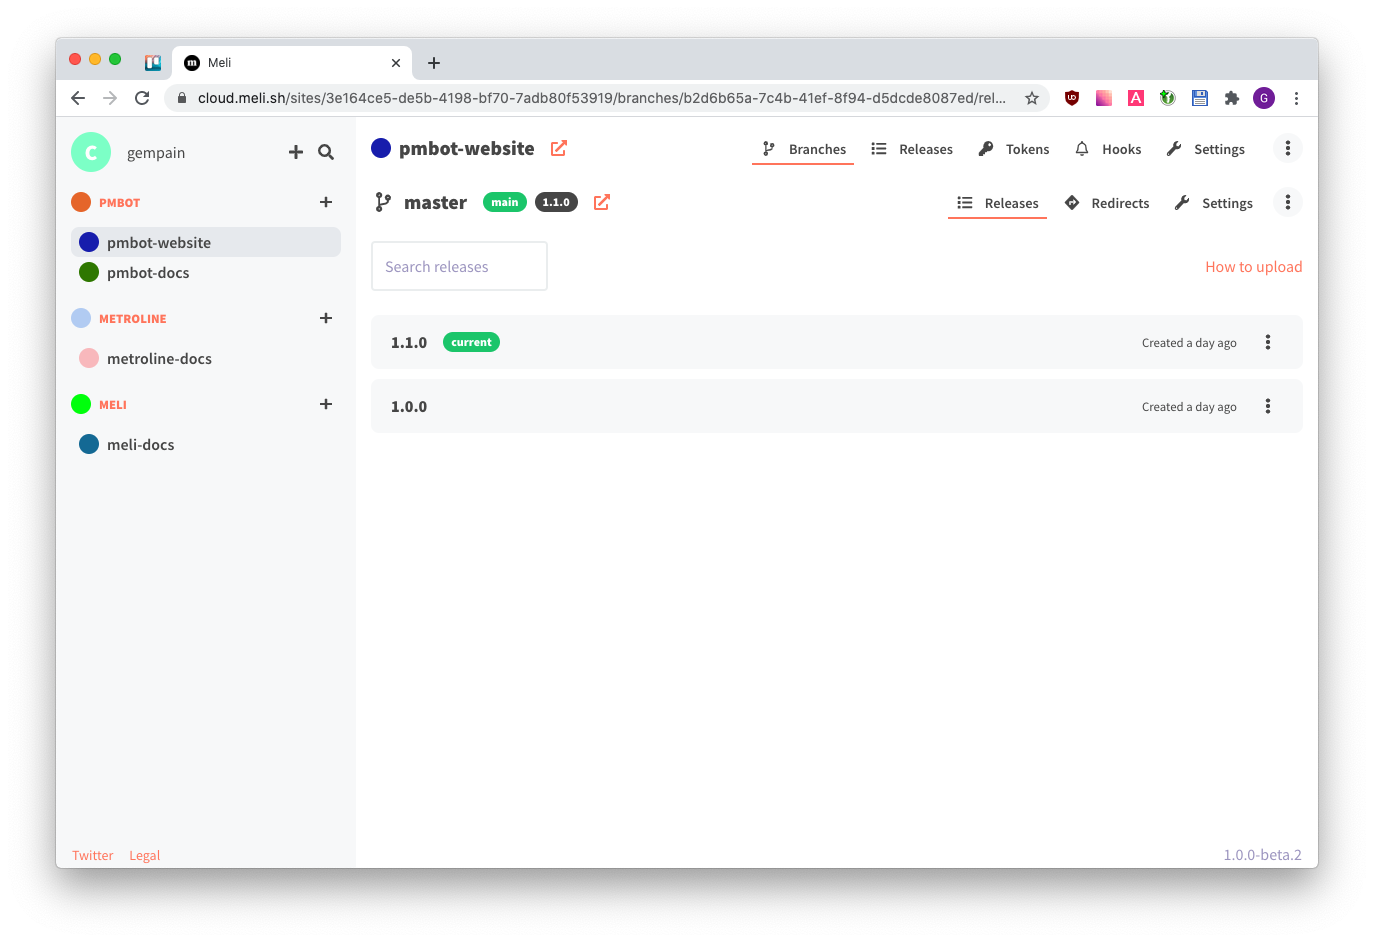
- Create a site in your dashboard, say
my-site - Upload a release with the
@getmeli/meliCLI - Setup
my-domain.comto point to your Meli server atmy-site.mymeli.com
- Create a site in your dashboard, say
Features
- Deploy unlimited static sites under a primary domain
- Unlimited organizations, teams, users and sites
- Seamless custom domains redirection
- Many ways to authenticate
- Automatic HTTPs certificate issuing with letsencrypt (or private ACME server)
- Deploy branches
- API with per-endpoint scopes
- Integrations (Webhooks, Slack, Mattermost, Email)
- Easily deploy and upgrade with Docker Compose
- Password protected pages
- Path overrides with in-memory files or reverse proxies
- Single page application mode
- Get deploy URL in pull requests and commit status
- Heavily customizable
- Increase test coverage
- API documentation
- Documentation
- Build an official project website
- Create a community discussion branch
- Deploy a cloud version
- Translations
- Extend integrations
- Accessibility
Development
Start UI
- Clone the UI repo.
npm i && npm start- The app is accessible from http://localhost:3001, but we develop from http://localhost:8080 (see below)
Start Caddy and the API
- Run
docker-compose -f ./docker-compose-dev.yml up -d - Configure your
.env(copy.env.exampleto start with) - Run
npm i && npm start
If you develop with the UI, you’ll need to clone the UI repo, then start it.
You can now browse at http://localhost:8080:
http://localhost:8080/=> UIhttp://localhost:8080/api,http://localhost:8080/authandhttp://localhost:8080/socket.io=> APIhttp://loopback.sh=> your sites will be served here
DNS config
You need to configure your machine to allow wildcard domains for development. We’ve got a few ways to do this.
Use loopback.sh
We’ve configured loopback.sh to point to 127.0.0.1, so you can develop with it. Update your .env.
MELI_SITES_URL=loopback.sh
Your sites will be served at *.loopback.sh.
Pros: simple, no config required Cons: you need to be connected to the internet
Using /etc/hosts
Unfortunately, /etc/hosts doesn’t support wildcard domains, so you’ll need to edit /etc/hosts for every site added to Meli:
127.0.0.1 my-site.test
127.0.0.1 my-channel.my-site.test
Pros: simple, can develop without internet Cons: have to reconfigure every time you add a site
Using dnsmasq
brew install dnsmasq

# tell dsnmasq to point *.test to 127.0.0.1
echo "address=/test/127.0.0.1" > /usr/local/etc/dnsmasq.conf

# start daemon
brew services start dnsmasq

# make OSX point to dnsmasq
sudo mkdir -p /etc/resolver

# tell os x to point *.test to 127.0.0.1
sudo echo "nameserver 127.0.0.1" > /etc/resolver/test

ping hello.test
Your sites will be served at *.test.
Pros: you don’t need to be connected to the internet, no need to reconfigure /etc/hosts Cons: a bit complex, config required


