docker-slim/docker-slim

DockerSlim (docker-slim): Don’t change anything in your Docker container image and minify it by up to 30x (and for compiled languages even more) making it secure too! (free and open source)
| repo name | docker-slim/docker-slim |
| repo link | https://github.com/docker-slim/docker-slim |
| homepage | https://dockersl.im |
| language | Go |
| size (curr.) | 58377 kB |
| stars (curr.) | 8171 |
| created | 2015-09-09 |
| license | Other |


Minify and Secure Docker containers (free and open source!)
Don’t change anything in your Docker container image and minify it by up to 30x making it secure too!
Keep doing what you are doing. No need to change anything. Use the base image you want. Use the package manager you want. Don’t worry about hand optimizing your Dockerfile. You shouldn’t have to throw away your tools and your workflow to have small container images.
Don’t worry about manually creating Seccomp and AppArmor security profiles. You shouldn’t have to become an expert in Linux syscalls, Seccomp and AppArmor to have secure containers. Even if you do know enough about it wasting time reverse engineering your application behavior can be time-consuming.
docker-slim will optimize and secure your containers by understanding your application and what it needs using various analysis techniques. It will throw away what you don’t need, reducing the attack surface of your container. What if you need some of those extra things to debug your container? You can use dedicated debugging side-car containers for that (more details below).
docker-slim has been used with Node.js, Python, Ruby, Java, Golang, Rust, Elixir and PHP (some app types) running on Ubuntu, Debian, CentOS, Alpine and even Distroless.
Watch this screencast to see how an application image is minified by more than 30x.

When docker-slim runs it gives you an opportunity to interact with the temporary container it creates. By default, it will pause and wait for your input before it continues its execution. You can change this behavior using the --continue-after flag.
If your application exposes any web interfaces (e.g., when you have a web server or an HTTP API), you’ll see the port numbers on the host machine you will need to use to interact with your application (look for the port.list and target.port.info messages on the screen). For example, in the screencast above you’ll see that the internal application port 8000 is mapped to port 32911 on your host.
Note that docker-slim will interact with your application for you if you enable HTTP probing with the --http-probe flag or other related HTTP probe flags. Some web applications built with scripting languages like Python or Ruby require service interactions to load everything in the application. Enable HTTP probing unless it gets in your way.
Minification Examples
Node.js application images:
- from ubuntu:14.04 - 432MB => 14MB (minified by 30.85X)
- from debian:jessie - 406MB => 25.1MB (minified by 16.21X)
- from node:alpine - 66.7MB => 34.7MB (minified by 1.92X)
- from node:distroless - 72.7MB => 39.7MB (minified by 1.83X)
Python application images:
- from ubuntu:14.04 - 438MB => 16.8MB (minified by 25.99X)
- from python:2.7-alpine - 84.3MB => 23.1MB (minified by 3.65X)
- from python:2.7.15 - 916MB => 27.5MB (minified by 33.29X)
- from centos:7 - 647MB => 23MB (minified by 28.57X)
- from centos/python-27-centos7 - 700MB => 24MB (minified by 29.01X)
- from python2.7:distroless - 60.7MB => 18.3MB (minified by 3.32X)
Ruby application images:
- from ubuntu:14.04 - 433MB => 13.8MB (minified by 31.31X)
- from ruby:2.2-alpine - 319MB => 27MB (minified by 11.88X)
- from ruby:2.5.3 - 978MB => 30MB (minified by 32.74X)
Golang application images:
- from golang:latest - 700MB => 1.56MB (minified by 448.76X)
- from ubuntu:14.04 - 531MB => 1.87MB (minified by 284.10X)
- from golang:alpine - 258MB => 1.56MB (minified by 165.61X)
- from centos:7 - 615MB => 1.87MB (minified by 329.14X)
Rust application images:
- from rust:1.31 - 2GB => 14MB (minified by 147.16X)
JAVA application images:
- from ubuntu:14.04 - 743.6 MB => 100.3 MB
PHP application images:
- from php:7.0-cli - 368MB => 26.6MB (minified by 13.85X)
Haskell application images:
- (Scotty service) from haskell:8 - 2.09GB => 16.6MB (minified by 125.32X)
- (Scotty service) from haskell:7 - 1.5GB => 21MB (minified by 71X)
Elixir application images:
- (Phoenix service) from elixir:1.6 - 1.1 GB => 37 MB (minified by 29.25X)
Note: The examples are in a separate repository: https://github.com/docker-slim/examples
Table of Contents generated with DocToc
- RECENT UPDATES
- INSTALLATION
- BASIC USAGE INFO
- QUICK SECCOMP EXAMPLE
- USING AUTO-GENERATED SECCOMP PROFILES
- ORIGINAL DEMO VIDEO
- DEMO STEPS
- USAGE DETAILS
- RUNNING CONTAINERIZED
- DOCKER CONNECT OPTIONS
- HTTP PROBE COMMANDS
- DEBUGGING MINIFIED CONTAINERS
- MINIFYING COMMAND LINE TOOLS
- FAQ
- Is it safe for production use?
- How can I contribute if I don’t know Go?
- What’s the best application for DockerSlim?
- Can I use DockerSlim with dockerized command line tools?
- What if my Docker images uses the USER command?
- Nginx fails in my minified image
- DockerSlim fails with a ‘no permission to read from’ error
- BUILD PROCESS
- DESIGN
- DEVELOPMENT PROGRESS
- ORIGINS
- ONLINE
- MINIFIED DOCKER HUB IMAGES
- CONTRIBUTING
- LICENSE
RECENT UPDATES
Latest version: 1.28.1 (3/9/2020)
This release enhances the xray command to show the detailed container image information including its layers and their files and directories. For more info about the latest release see the CHANGELOG.
INSTALLATION
- Download the zip package for your platform.
- Unzip the package.
- Add the location where you unzipped the package to your PATH environment variable (optional).
If the directory where you extracted the binaries is not in your PATH then you’ll need to run your docker-slim commands from that directory.
To use the Docker image distribution just start using the dslim/docker-slim container image.
The OS-specific installers for docker-slim will be available soon (there’s already a couple of community Homebrew formulas for Mac and Linux, but they need to be enhanced to work properly).
BASIC USAGE INFO
docker-slim [global flags] [xray|build|profile|update|version] [command-specific flags] <IMAGE_ID_OR_NAME>
COMMANDS
xray- do static analysis for the target container image (including ‘reverse engineering’ the Dockerfile for the image)profile- doxrayplus dynamic container analysisbuild- doprofileplus an ability to create a new optimized image along with the security profilesversion- show the version informationupdate- updatedocker-slimto the latest version
Example: docker-slim build my/sample-app
See the USAGE DETAILS section for more details. You can also get additional information about the parameters running docker-slim. Run docker-slim without any parameters and you’ll get a high level overview of the available commands. Run a docker-slim command without any parameters and you’ll get more information about that command (e.g., docker-slim build).
QUICK SECCOMP EXAMPLE
If you want to auto-generate a Seccomp profile AND minify your image use the build command. If you only want to auto-generate a Seccomp profile (along with other interesting image metadata) use the profile command.
Step one: run DockerSlim
docker-slim build your-name/your-app
Step two: use the generated Seccomp profile
docker run --security-opt seccomp:<docker-slim directory>/.images/<YOUR_APP_IMAGE_ID>/artifacts/your-name-your-app-seccomp.json <your other run params> your-name/your-app
Feel free to copy the generated profile :-)
You can use the generated Seccomp profile with your original image or with the minified image.
USING AUTO-GENERATED SECCOMP PROFILES
You can use the generated profile with your original image or with the minified image DockerSlim created:
docker run -it --rm --security-opt seccomp:path_to/my-sample-node-app-seccomp.json -p 8000:8000 my/sample-node-app.slim
ORIGINAL DEMO VIDEO
DEMO STEPS
The demo runs on Mac OS X, but you can build a linux version. Note that these steps are different from the steps in the demo video.
- Get the docker-slim Mac, Linux or Linux ARM binaries. Unzip them and optionally add their directory to your PATH environment variable if you want to use the app from other locations.
The extracted directory contains two binaries:
docker-slim<- the main applicationdocker-slim-sensor<- the sensor application used to collect information from running containers
- Clone the
examplesrepo to use the sample apps (note: the examples have been moved to a separate repo). You can skip this step if you have your own app.
git clone https://github.com/docker-slim/examples.git
- Create a Docker image for the sample node.js app in
examples/node_ubuntu. You can skip this step if you have your own app.
cd examples/node_ubuntu
eval "$(docker-machine env default)" <- optional (depends on how Docker is installed on your machine and what kind of Docker version you are using); if the Docker host is not running you’ll need to start it first: docker-machine start default; see the Docker connect options section for more details.
docker build -t my/sample-node-app .
- Run
docker-slim:
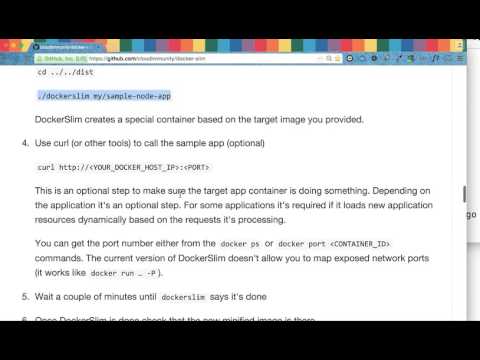
./docker-slim build my/sample-node-app <- run it from the location where you extraced the docker-slim binaries (or update your PATH env var to include the docker-slim bin directory)
DockerSlim creates a special container based on the target image you provided. It also creates a resource directory where it stores the information it discovers about your image: <docker-slim directory>/.images/<TARGET_IMAGE_ID>.
By default, docker-slim will run its http probe against the temporary container. If you are minifying a command line tool that doesn’t expose any web service interface you’ll need to explicitly disable http probing (by setting --http-probe=false).
- Use curl (or other tools) to call the sample app (optional)
curl http://<YOUR_DOCKER_HOST_IP>:<PORT>
This is an optional step to make sure the target app container is doing something. Depending on the application it’s an optional step. For some applications it’s required if it loads new application resources dynamically based on the requests it’s processing (e.g., Ruby or Python).
You’ll see the mapped ports printed to the console when docker-slim starts the target container. You can also get the port number either from the docker ps or docker port <CONTAINER_ID> commands. The current version of DockerSlim doesn’t allow you to map exposed network ports (it works like docker run … -P).
- Press and wait until
docker-slimsays it’s done
By default or when http probing is enabled explicitly docker-slim will continue its execution once the http probe is done running. If you explicitly picked a different continue-after option follow the expected steps. For example, for the enter continue-after option you must press the enter button on your keyboard.
If http probing is enabled (when http-probe is set) and if continue-after is set to enter and you press the enter key before the built-in HTTP probe is done the probe might produce an EOF error because docker-slim will shut down the target container before all probe commands are done executing. It’s ok to ignore it unless you really need the probe to finish.
- Once DockerSlim is done check that the new minified image is there
docker images
You should see my/sample-node-app.slim in the list of images. Right now all generated images have .slim at the end of its name.
- Use the minified image
docker run -it --rm --name="slim_node_app" -p 8000:8000 my/sample-node-app.slim
USAGE DETAILS
docker-slim [global options] command [command options] <Docker image ID or name>
Commands:
build- Collect fat image information and build a slim image from itprofile- Collect fat image information and generate a fat container reportinfo- Collect fat image information and reverse engineers its Dockerfile (no runtime container analysis)version- Show docker-slim and docker version informationupdate- Update docker-slim
Global options:
--report- command report location (target location where to save the executed command results;slim.report.jsonby default; set it tooffto disable)--check-version- check if the current version is outdate--version- print the version--debug- enable debug logs--verbose- enable info logs--log-level- set the logging level (‘debug’, ‘info’, ‘warn’ (default), ‘error’, ‘fatal’, ‘panic’)--log-format- set the format used by logs (‘text’ (default), or ‘json’)--log- log file to store logs--host- Docker host address--tls- use TLS connecting to Docker--tls-verify- do TLS verification--tls-cert-path- path to TLS cert files--state-path value- DockerSlim state base path (must set it if the DockerSlim binaries are not in a writable directory!)--archive-state- Archives DockerSlim state to the selected Docker volume (default volume -docker-slim-state). By default, enabled when DockerSlim is running in a container (disabled otherwise). Set it tooffto disable explicitly.--in-container- Set it to true to explicitly indicate that DockerSlim is running in a container (if it’s not set DockerSlim will try to analyze the environment where it’s running to determine if it’s containerized)
To get more command line option information run docker-slim without any parameters or select one of the top level commands to get the command-specific information.
To disable the version checks set the global --check-version flag to false (e.g., --check-version=false) or you can use the DSLIM_CHECK_VERSION environment variable.
XRAY COMMAND OPTIONS
--changes value- show layer change details for the selected change type (values: none, all, delete, modify, add)--layer value- show details for the selected layer (using layer index or ID)--remove-file-artifacts- remove file artifacts when command is done (note: you’ll loose the reverse engineered Dockerfile)
BUILD COMMAND OPTIONS
--http-probe- enables HTTP probing (ENABLED by default; you have to disable the probe if you don’t need it by setting the flag tofalse)--http-probe-cmd- additional HTTP probe command [zero or more]--http-probe-cmd-file- file with user defined HTTP probe commands--http-probe-retry-count- number of retries for each HTTP probe (default: 5)--http-probe-retry-wait- number of seconds to wait before retrying HTTP probe (doubles when target is not ready; default: 8)--http-probe-ports- explicit list of ports to probe (in the order you want them to be probed; excluded ports are not probed!)--http-probe-full- do full HTTP probe for all selected ports (if false, finish after first successful scan; default: false)--show-clogs- show container logs (from the container used to perform dynamic inspection)--show-blogs- show build logs (when the minified container is built)--copy-meta-artifacts- copy meta artifacts to the provided location--remove-file-artifacts- remove file artifacts when command is done (note: you’ll loose autogenerated Seccomp and Apparmor profiles unless you copy them with thecopy-meta-artifactsflag or if you archive the state)--tag- use a custom tag for the generated image (instead of the default:<original_image_name>.slim)--entrypoint- override ENTRYPOINT analyzing image--cmd- override CMD analyzing image--mount- mount volume analyzing image (the mount parameter format is identical to the-vmount command in Docker) [zero or more]--include-path- Include directory or file from image [zero or more] (optionally overwriting the artifact’s permissions, user and group information; format:target:octalPermFlags#uid#gid; see the non-default USER FAQ section for more details)--include-path-file- Load directory or file includes from a file (optionally overwriting the artifact’s permissions, user and group information; format:target:octalPermFlags#uid#gid; see the non-default USER FAQ section for more details)--include-bin value- Include binary from image (executable or shared object using its absolute path)--include-exe value- Include executable from image (by executable name)--include-shell- Include basic shell functionality--path-perms- Set path permissions/user/group in optimized image (format:target:octalPermFlags#uid#gid; see the non-default USER FAQ section for more details)--path-perms-file- File with path permissions to set (format:target:octalPermFlags#uid#gid; see the non-default USER FAQ section for more details)--env- override ENV analyzing image [zero or more]--workdir- override WORKDIR analyzing image--network- override default container network settings analyzing image--expose- use additional EXPOSE instructions analyzing image [zero or more]--link- add link to another container analyzing image [zero or more]--hostname- override default container hostname analyzing image--etc-hosts-map- add a host to IP mapping to /etc/hosts analyzing image [zero or more]--container-dns- add a dns server analyzing image [zero or more]--container-dns-search- add a dns search domain for unqualified hostnames analyzing image [zero or more]--continue-after- Select continue mode: enter | signal | probe | timeout or numberInSeconds (default: enter)--dockerfile- The source Dockerfile name to build the fat image before it’s minified.--use-local-mounts- Mount local paths for target container artifact input and output (off, by default)--use-sensor-volume- Sensor volume name to use (set it to your Docker volume name if you manage your owndocker-slimsensor volume).--keep-tmp-artifacts- Keep temporary artifacts when command is done (off, by default).--keep-perms- Keep artifact permissions as-is (true, by default)--run-target-as-user- Run target app (in the temporary container) as USER from Dockerfile (true, by default)--new-entrypoint- New ENTRYPOINT instruction for the optimized image--new-cmd- New CMD instruction for the optimized image--new-expose- New EXPOSE instructions for the optimized image--new-workdir- New WORKDIR instruction for the optimized image--new-env- New ENV instructions for the optimized image
The --include-path option is useful if you want to customize your minified image adding extra files and directories. The --include-path-file option allows you to load multiple includes from a newline delimited file. Use this option if you have a lot of includes. The includes from --include-path and --include-path-file are combined together. Future versions will also include the --exclude-path option to have even more control.
The --continue-after option is useful if you need to script docker-slim. If you pick the probe option then docker-slim will continue executing the build command after the HTTP probe is done executing. If you pick the timeout option docker-slim will allow the target container to run for 60 seconds before it will attempt to collect the artifacts. You can specify a custom timeout value by passing a number of seconds you need instead of the timeout string. If you pick the signal option you’ll need to send a USR1 signal to the docker-slim process.
The --include-shell option provides a simple way to keep a basic shell in the minified container. Not all shell commands are included. To get additional shell commands or other command line utilities use the --include-exe and/or --include-bin options. Note that the extra apps and binaries might missed some of the non-binary dependencies (which don’t get picked up during static analysis). For those additional dependencies use the --include-path and --include-path-file options.
The --dockerfile option makes it possible to build a new minified image directly from source Dockerfile. Pass the Dockerfile name as the value for this flag and pass the build context directory or URL instead of the docker image name as the last parameter for the docker-slim build command: docker-slim build --dockerfile Dockerfile --tag my/custom_minified_image_name . If you want to see the console output from the build stages (when the fat and slim images are built) add the --show-blogs build flag. Note that the build console output is not interactive and it’s printed only after the corresponding build step is done. The fat image created during the build process has the .fat suffix in its name. If you specify a custom image tag (with the --tag flag) the .fat suffix is added to the name part of the tag. If you don’t provide a custom tag the generated fat image name will have the following format: docker-slim-tmp-fat-image.<pid_of_docker-slim>.<current_timestamp>. The minified image name will have the .slim suffix added to that auto-generated container image name (docker-slim-tmp-fat-image.<pid_of_docker-slim>.<current_timestamp>.slim). Take a look at this python examples to see how it’s using the --dockerfile flag.
The --use-local-mounts option is used to choose how the docker-slim sensor is added to the target container and how the sensor artifacts are delivered back to the master. If you enable this option you’ll get the original docker-slim behavior where it uses local file system volume mounts to add the sensor executable and to extract the artifacts from the target container. This option doesn’t always work as expected in the dockerized environment where docker-slim itself is running in a Docker container. When this option is disabled (default behavior) then a separate Docker volume is used to mount the sensor and the sensor artifacts are explicitly copied from the target container.
RUNNING CONTAINERIZED
The current version of docker-slim is able to run in containers. It will try to detect if it’s running in a containerized environment, but you can also tell docker-slim explicitly using the --in-container global flag.
You can run docker-slim in your container directly or you can use the docker-slim container in your containerized environment. If you are using the docker-slim container make sure you run it configured with the Docker IPC information, so it can communicate with the Docker daemon. The most common way to do it is by mounting the Docker unix socket to the docker-slim container. Some containerized environments (like Gitlab and their dind service) might not expose the Docker unix socket to you, so you’ll need to make sure the environment variables used to communicate with Docker (e.g., DOCKER_HOST) are passed to the docker-slim container. Note that if those environment variables reference any kind of local host names those names need to be replaced or you need to tell docker-slim about them using the --etc-hosts-map flag. If those environment variables reference local files those local files (e.g., files for TLS cert validation) will need to be copied to a temporary container, so that temporary container can be used as a data container to make those files accessible by the docker-slim container.
When docker-slim runs in a container it will attempt to save its execution state in a separate Docker volume. If the volume doesn’t exist it will try to create it (docker-slim-state, by default). You can pick a different state volume or disable this behavior completely by using the global --archive-state flag. If you do want to persist the docker-slim execution state (which includes the seccomp and AppArmor profiles) without using the state archiving feature you can mount your own volume that maps to the /bin/.docker-slim-state directory in the docker-slim container.
By default, docker-slim will try to create a Docker volume for its sensor unless one already exists. If this behavior is not supported by your containerized environment you can create a volume separately and pass its name to docker-slim using the --use-sensor-volume flag.
Here’s a basic example of how to use the containerized version of docker-slim:
docker run -it --rm -v /var/run/docker.sock:/var/run/docker.sock dslim/docker-slim build your-docker-image-name
Here’s a GitLab example for their dind .gitlab-ci.yml config file:
docker run -e DOCKER_HOST=tcp://$(grep docker /etc/hosts | cut -f1):2375 dslim/docker-slim build your-docker-image-name
Here’s a CircleCI example for their remote docker .circleci/config.yml config file (used after the setup_remote_docker step):
docker create -v /dcert_path --name dcert alpine:latest /bin/true
docker cp $DOCKER_CERT_PATH/. dcert:/dcert_path
docker run --volumes-from dcert -e DOCKER_HOST=$DOCKER_HOST -e DOCKER_TLS_VERIFY=$DOCKER_TLS_VERIFY -e DOCKER_CERT_PATH=/dcert_path dslim/docker-slim build your-docker-image-name
DOCKER CONNECT OPTIONS
If you don’t specify any Docker connect options docker-slim expects to find the following environment variables: DOCKER_HOST, DOCKER_TLS_VERIFY (optional), DOCKER_CERT_PATH (required if DOCKER_TLS_VERIFY is set to "1")
On Mac OS X you get them when you run eval "$(docker-machine env default)" or when you use the Docker Quickstart Terminal.
If the Docker environment variables are configured to use TLS and to verify the Docker cert (default behavior), but you want to disable the TLS verification you can override the TLS verification behavior by setting the --tls-verify to false:
docker-slim --tls-verify=false build --http-probe=true my/sample-node-app-multi
You can override all Docker connection options using these flags: --host, --tls, --tls-verify, --tls-cert-path. These flags correspond to the standard Docker options (and the environment variables).
If you want to use TLS with verification:
docker-slim --host=tcp://192.168.99.100:2376 --tls-cert-path=/Users/youruser/.docker/machine/machines/default --tls=true --tls-verify=true build --http-probe=true my/sample-node-app-multi
If you want to use TLS without verification:
docker-slim --host=tcp://192.168.99.100:2376 --tls-cert-path=/Users/youruser/.docker/machine/machines/default --tls=true --tls-verify=false build --http-probe=true my/sample-node-app-multi
If the Docker environment variables are not set and if you don’t specify any Docker connect options docker-slim will try to use the default unix socket.
HTTP PROBE COMMANDS
If the HTTP probe is enabled (note: it is enabled by default) it will default to running GET / with HTTP and then HTTPS on every exposed port. You can add additional commands using the --http-probe-cmd and --http-probe-cmd-file options.
The --http-probe-cmd option is good when you want to specify a small number of simple commands where you select some or all of these HTTP command options: protocol, method (defaults to GET), resource (path and query string).
If you only want to use custom HTTP probe command and you don’t want the default GET / command added to the command list you explicitly provided you’ll need to set --http-probe to false when you specify your custom HTTP probe command. Note that this inconsistency will be addressed in the future releases to make it less confusing.
Here are a couple of examples:
Adds two extra probe commands: GET /api/info and POST /submit (tries http first, then tries https):
docker-slim build --show-clogs --http-probe-cmd /api/info --http-probe-cmd POST:/submit my/sample-node-app-multi
Adds one extra probe command: POST /submit (using only http):
docker-slim build --show-clogs --http-probe-cmd http:POST:/submit my/sample-node-app-multi
The --http-probe-cmd-file option is good when you have a lot of commands and/or you want to select additional HTTP command options.
Here’s an example:
docker-slim build --show-clogs --http-probe-cmd-file probeCmds.json my/sample-node-app-multi
Commands in probeCmds.json:
{
  "commands":
  [
   {
     "resource": "/api/info"
   },
   {
     "method": "POST",
     "resource": "/submit"
   },
   {
     "procotol": "http",
     "resource": "/api/call?arg=one"
   },
   {
     "protocol": "http",
     "method": "POST",
     "resource": "/submit2",
     "body": "key=value"
   }
  ]
}
The HTTP probe command file path can be a relative path (relative to the current working directory) or it can be an absolute path.
For each HTTP probe call docker-slim will print the call status. Example: info=http.probe.call status=200 method=GET target=http://127.0.0.1:32899/ attempt=1 error=none.
You can execute your own external HTTP requests using the target.port.list field in the container info message docker-slim prints when it starts its test container: docker-slim[build]: info=container name=<your_container_name> id=<your_container_id> target.port.list=[<comma_separated_list_of_port_numbers_to_use>] target.port.info=[<comma_separated_list_of_port_mapping_records>]. Example: docker-slim[build]: info=container name=dockerslimk_42861_20190203084955 id=aa44c43bcf4dd0dae78e2a8b3ac011e7beb6f098a65b09c8bce4a91dc2ff8427 target.port.list=[32899] target.port.info=[9000/tcp => 0.0.0.0:32899]. With this information you can run curl or other HTTP request generating tools: curl http://localhost:32899.
DEBUGGING MINIFIED CONTAINERS
You can create dedicated debugging side-car container images loaded with the tools you need for debugging target containers. This allows you to keep your production container images small. The debugging side-car containers attach to the running target containers.
Assuming you have a running container named node_app_alpine you can attach your debugging side-car with a command like this: docker run --rm -it --pid=container:node_app_alpine --net=container:node_app_alpine --cap-add sys_admin alpine sh. In this example, the debugging side-car is a regular alphine image. This is exactly what happens with the node_alpine app sample (located in the node_alpine directory of the examples repo) and the run_debug_sidecar.command helper script.
If you run the ps command in the side-car you’ll see the application from the target container:
# ps
PID   USER     TIME   COMMAND
    1 root       0:00 node /opt/my/service/server.js
   13 root       0:00 sh
   38 root       0:00 ps
You can access the target container file system through /proc/<TARGET_PID>/root:
# ls -lh /proc/1/root/opt/my/service
total 8
drwxr-xr-x    3 root     root        4.0K Sep  2 15:51 node_modules
-rwxr-xr-x    1 root     root         415 Sep  8 00:52 server.js
Some of the useful debugging commands include cat /proc/<TARGET_PID>/cmdline, ls -l /proc/<TARGET_PID>/cwd, cat /proc/1/environ, cat /proc/<TARGET_PID>/limits, cat /proc/<TARGET_PID>/status and ls -l /proc/<TARGET_PID>/fd.
MINIFYING COMMAND LINE TOOLS
Unless the default CMD instruction in your Dockerfile is sufficient you’ll have to specify command line parameters when you execute the build command in DockerSlim. This can be done with the --cmd option.
Other useful command line parameters:
--show-clogs- use it if you want to see the output of your container.--mount- use it to mount a volume when DockerSlim inspects your image.--entrypoint- use it if you want to override the ENTRYPOINT instruction when DockerSlim inspects your image.
Note that the --entrypoint and --cmd options don’t override the ENTRYPOINT and CMD instructions in the final minified image.
Here’s a sample build command:
docker-slim build --show-clogs=true --cmd docker-compose.yml --mount $(pwd)/data/:/data/ dslim/container-transform
It’s used to minify the container-transform tool. You can get the minified image from Docker Hub.
FAQ
Is it safe for production use?
Yes! Either way, you should test your Docker images.
How can I contribute if I don’t know Go?
You don’t need to read the language spec and lots of books :-) Go through the Tour of Go and optionally read 50 Shades of Go and you’ll be ready to contribute!
What’s the best application for DockerSlim?
DockerSlim will work for any dockerized application; however, DockerSlim automates app interactions for applications with an HTTP API. You can use DockerSlim even if your app doesn’t have an HTTP API. You’ll need to interact with your application manually to make sure DockerSlim can observe your application behavior.
Can I use DockerSlim with dockerized command line tools?
Yes. The --cmd, --entrypoint, and --mount options will help you minify your image. The container-transform tool is a good example.
Notes:
You can explore the artifacts DockerSlim generates when it’s creating a slim image. You’ll find those in <docker-slim directory>/.images/<TARGET_IMAGE_ID>/artifacts. One of the artifacts is a “reverse engineered” Dockerfile for the original image. It’ll be called Dockerfile.fat.
If you’d like to see the artifacts without running docker-slim you can take a look at the examples/artifacts directory in this repo. It doesn’t include any image files, but you’ll find:
- a reverse engineered Dockerfile (
Dockerfile.fat) - a container report file (
creport.json) - a sample AppArmor profile (which will be named based on your original image name)
- and a sample Seccomp profile
If you don’t want to create a minified image and only want to “reverse engineer” the Dockerfile you can use the info command.
What if my Docker images uses the USER command?
The current version of DockerSlim does include support for non-default users (take a look at the non-default user examples (including the ElasticSearch example located in the 3rdparty directory) in the examples repo. Please open tickets if something doesn’t work for you.
Everything should work as-is, but for the special cases where the current behavior don’t work as expected you can adjust what DockerSlim does using various build command parameters: --run-target-as-user, --keep-perms, --path-perms, --path-perms-file (along with the --include-* parameters).
The --run-target-as-user parameter is enabled by default and it controls if the application in the temporary container is started using the identity from the USER instruction in the container’s Dockerfile.
The --keep-perms parameter is also enabled by default. It tells DockerSlim to retain the permissions and the ownership information for the files and directories copied to the optimized container image.
The --path-perms and --path-perms-file parameters are similar to the --include-path and --include-path-file parameters. They are used to overwrite the permission and the user/group information for the target files and directories. Note that the target files/directories are expected to be in the optimized container image. If you don’t know if the target files/directories will be in the optimized container you’ll need to use one of the --include-* parameters (e.g., --include-path-file) to explicitly require those artifacts to be included. You can specify the permissions and the ownership information in the --include-* parameters too (so you don’t need to have the --path-* parameters just to set the permissions).
The --path-* and --include-* params use the same format to communicate the permission/owernship info: TARGET_PATH_OR_NAME:PERMS_IN_OCTAL_FORMAT#USER_ID#GROUP_ID.
You don’t have to specify the user and group IDs if you don’t want to change them.
Here’s an example using these parameters to minify the standard nginx image adding extra artifacts and changing their permissions: docker-slim build --include-path='/opt:770#104#107' --include-path='/bin/uname:710' --path-perms='/tmp:700' nginx.
This is what you’ll see in the optimized container image:
drwx------  0 0      0           0 Feb 28 22:15 tmp/
-rwx--x---  0 0      0       31240 Mar 14  2015 bin/uname
drwxrwx---  0 104    107         0 Feb 28 22:13 opt/
The uname binary isn’t used by nginx, so the --include-path parameter is used to keep it in the optimized image changing its permissions to 710.
The /tmp directory will be included in the optimized image on its own, so the --path-perms parameter is used to change its permissions to 700.
When you set permissions/user/group on a directory the settings are only applied to that directory and not to the artifacts inside. The future versions will allow you to apply the same settings to everything inside the target directory too.
Also note that for now you have to use numeric user and group IDs. The future versions will allow you to use user and group names too.
Nginx fails in my minified image
If you see nginx: [emerg] mkdir() "/var/lib/nginx/body" failed it means your nginx setup uses a non-standard temporary directory. Nginx will fail if the base directory for its temporary folders doesn’t exist (they won’t create the missing intermediate directories). Normally it’s /var/lib/nginx, but if you have a custom config that points to something else you’ll need to add an --include-path flag as an extra flag when you run docker-slim.
DockerSlim fails with a ‘no permission to read from’ error
You can get around this problem by running DockerSlim from a root shell. That way it will have access to all exported files.
DockerSlim copies the relevant image artifacts trying to preserve their permissions. If the permissions are too restrictive the master app might not have sufficient priviledge to access these files when it’s building the new minified image.
BUILD PROCESS
Use Go 1.13 or higher to build docker-slim. You can use earlier version of Go, but it can’t be lower than Go 1.5.1. Versions prior to 1.5.1 have a Docker/ptrace related bug (Go kills processes if your app is PID 1). When the ‘monitor’ is separate from the ‘launcher’ process it will be possible to user older Go versions again.
Tools:
license-bill-of-materials- Optional tool to track dependencies and their licenses.golint- Optional tool for code analysis. Seehttps://github.com/golang/lintfor more details.
You can install these tools using the tools.get.sh shell script in the scripts directory.
Notes:
- Make sure you have
golintif you intend to run thesrc.inspect.shormac.src.inspect.commandscripts.
Build Steps
You have multiple options to build docker-slim:
- Run
make(or./scripts/docker-builder.run.shor click on./scripts/mac/docker-builder.run.commandon Macs) from the project directory (buildsdocker-slimin a Docker container; great if you don’t want to install Go on your local machine and if you already have Docker) - Run
make build(or./scripts/src.build.shor click on./scripts/mac/src.build.commandon Macs) to builddocker-slimnatively (requires Go installed locally)
DESIGN
CORE CONCEPTS
- Inspect container metadata (static analysis)
- Inspect container data (static analysis)
- Inspect running application (dynamic analysis)
- Build an application artifact graph
- Use the collected application data to build small images
- Use the collected application data to auto-generate various security framework configurations.
DYNAMIC ANALYSIS OPTIONS
- Instrument the container image (and replace the entrypoint/cmd) to collect application activity data
- Use kernel-level tools that provide visibility into running containers (without instrumenting the containers)
- Disable relevant namespaces in the target container to gain container visibility (can be done with runC)
SECURITY
The goal is to auto-generate Seccomp, AppArmor, (and potentially SELinux) profiles based on the collected information.
- AppArmor profiles
- Seccomp profiles
CHALLENGES
Some of the advanced analysis options require a number of Linux kernel features that are not always included. The kernel you get with Docker Machine / Boot2docker is a great example of that.
DEVELOPMENT PROGRESS
TODO
- AppArmor profile improvements
- Better support for command line applications (e.g., ability to specify multiple executions)
- Discover HTTP endpoints to make the HTTP probe more intelligent.
- Scripting language dependency discovery in the “scanner” app.
- Explore additional dependency discovery methods.
- Build/use a custom Boot2docker kernel with every required feature turned on.
- “Live” image create mode - to create new images from containers where users install their applications interactively.
ORIGINS
DockerSlim was a Docker Global Hack Day #dockerhackday project. It barely worked at the time, but it did get a win in Seattle and it took the second place in the Plumbing category overall :-)

Since then it’s been improved and it works pretty well for its core use cases. It can be better though. That’s why the project needs your help! You don’t need to know much about Docker and you don’t need to know anything about Go. You can contribute in many different ways. For example, use DockerSlim on your images and open a Github issue documenting your experience even if it worked just fine :-)
ONLINE
IRC (freenode): #dockerslim
Docker Hub: dslim (dockerslim is already taken :-()
MINIFIED DOCKER HUB IMAGES
CONTRIBUTING
If the project sounds interesting or if you found a bug see CONTRIBUTING.md and submit a PR!
LICENSE
Apache License v2, see LICENSE for details.


